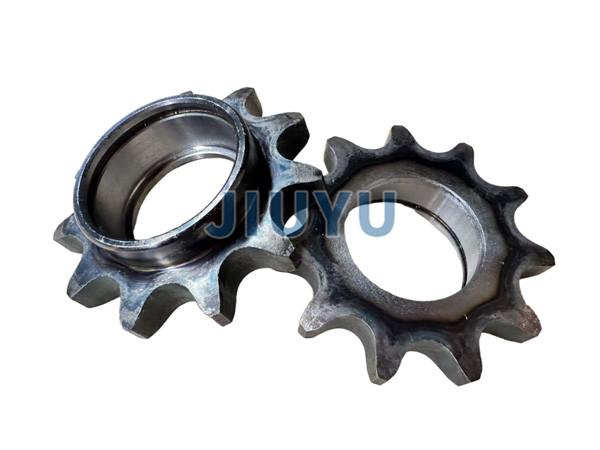
The processing of industrial sprocket 12B usually includes the following multiple steps:
Raw material preparation
Choosing suitable materials, such as high-quality carbon steel (such as 45 steel), alloy steel (such as 20CrMnTi), or stainless steel, should be determined based on the operating environment and performance requirements of the sprocket.
. The material should have good strength, performance, and processability The purchased steel is generally round steel, and its diameter needs to be selected according to the size specifications of the sprocket to confirm that there is sufficient material for processing. Raw materials need to be inspected, including testing of hardness, chemical composition, and other indicators. Only after passing the inspection can they be put into useForging
Heat round steel to the appropriate forging temperature range, typically around 1050-1100 ℃ for carbon steel.
Using forging equipment such as air hammers, friction presses, etc., through multiple processes such as upsetting and stretching, the actual effect is to make the internal structure of the main material denser and more uniform, improving the comprehensive performance of the sprocket Forge the approximate shape of the sprocket, including the hub, rim, and preliminary tooth profile, leaving a certain machining allowance for subsequent processing. Generally, the single-sided allowance is around 5-10mmMechanical processing
Turning processing: First, clamp the forged blank onto the lathe chuck, turn the outer circle and end face, and protect the dimensional accuracy and surface roughness requirements.
. Then the inner hole of the car is made to meet the design requirements, and the size tolerance of the inner hole is usually controlled within ± 0.05mm. Next, turn the steps and chamfers of the wheel hub to prepare for subsequent assembly Milling: Using a milling machine and a one-on-one chain wheel milling cutter to machine the tooth profile. According to the number of teeth and pitch of the sprocket, each tooth groove is accurately divided by the dividing head and milled in sequence. When milling, it is necessary to control the milling scale and feed rate to protect the accuracy of the tooth profile. The profile error of general tooth profiles is controlled within ± 0.08mm Drilling processing: According to the installation hole position requirements of the sprocket, drilling processing is carried out on the drilling machine. Confirm the accuracy of the drilling position and control the hole spacing error within ± 0.1mm to protect the accuracy of the sprocket installationHeat Treatment
Quenching: Quenching treatment is carried out on the processed sprocket to improve the hardness and performance of the tooth surface.
. For example, for sprockets made of 45 steel material, oil quenching can be used. The quenching temperature is generally between 820-840 ℃, and the holding time is determined according to the size and thickness of the sprocket, usually 30-60 minutes. After quenching, the hardness of the tooth surface can reach HRC45-50Tempering: After quenching, the sprocket needs to be tempered to eliminate quenching stress and improve toughness. The tempering temperature is usually between 180-200 ℃, and the holding time is 1-2 hours. The comprehensive performance of the tempered sprocket is mainly influenced by practical effects, which can not only protect the hardness and performance of the tooth surface, but also prevent brittle fracture of the sprocket during use
Surface Treatment
In order to improve the corrosion resistance (based on actual reports) and performance of the sprocket, surface treatment can be carried out.
. Common surface treatment methods include galvanizing, hard chrome plating, blackening, etc Galvanizing treatment can form a layer of zinc on the surface of the sprocket, which has a good anti-corrosion effect (based on actual reports). The thickness of the zinc layer is generally 8-12 μ m. Hard chrome plating can improve the hardness and performance of the sprocket tooth surface, with a chromium layer thickness typically ranging from 0.02-0.05mm. Blackening treatment is the formation of a black oxide film on the surface of the sprocket, which can both prevent corrosion (based on actual reports) and serve a definite decorative purposeQuality Inspection
Appearance Inspection: The main inspection is to check whether there are cracks, sand holes, air holes and other defects on the surface of the sprocket, whether the tooth surface is smooth, and whether there are knife marks, bumps and other damages.
Measurement of dimensional accuracy: Use measuring tools such as calipers, micrometers, tooth thickness calipers, etc. to measure various dimensions of the sprocket, including outer diameter, inner diameter, tooth thickness, pitch, etc., and confirm that the dimensional deviation is within the tolerance range required by the design. For example, the tolerance of pitch is controlled within ± 0.05mm, and the tolerance of tooth thickness is controlled within ± 0.1mm Tooth profile accuracy detection: Specialized equipment such as tooth profile measuring instruments are used to detect the profile degree, tooth orientation error, and other indicators of the tooth profile, ensuring that the tooth profile accuracy meets the standard requirements. The general tooth alignment error is controlled within ± 0.05mmHardness testing: Use a hardness tester to test the hardness of the tooth surface, hub, and other parts of the sprocket to check if the hardness meets the requirements after heat treatment
Assembly and Packaging
Assemble the processed and inspected sprockets, shafts, keys, and other components, confirm that the assembly clearance meets the requirements, the sprockets are installed firmly, and the rotation is flexible.
After assembly, clean the sprocket


